Create a Multi-Invoice File
To start Quick Invoice:
- Log on to eBillingHub, point to Billing
on the menu at the top of the window, and click the Multi
Invoice link. eBillingHub displays a list of clients with active
invoices in eBillingHub.
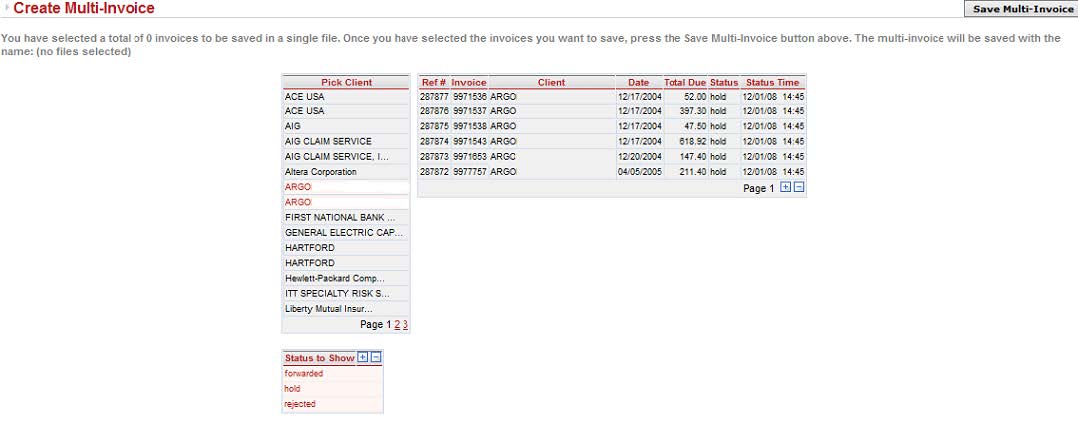
- Select the client for which you want to
create the multi-invoice file. eBillingHub displays a list of active
invoices for that client. If more than one client in your system is
mapped to the same client in eBillingHub, all the clients that are
mapped to the same client in the Hub will be highlighted. In the example
above, there are two Argo clients in the Time and Billing system that
are both mapped to the same client in eBillingHub, so when one of
the clients is selected, the other client is also selected.
- Do one of the following:
- Click on the invoices that you want
to include to select them.
- Click the plus sign (+) to select
all of the invoices on the page.
- Click on a selected invoice, or
click the minus sign (-) to deselect all the invoices on the page.
If there are multiple pages, you will need to do
this on each page. Click the page number to go to the desired page. In
the example screen, all of the invoices on Hold are selected for inclusion
in the multi-invoice file.
A summary at the top of the page shows the number
of invoices included in the file and the name of the file.
Click Save
Multi-Invoice to save the LEDES file with the file name in
the directory specified by your eBilling administrator when eBillingHub
was configured.