Map Expense Codes
To change the Billing Wizard Configuration:
- From the Main
Menu, go to Configuration.
- Click Configure
eBillingHub.
- Click the
Configure System tab.
- Click the Map
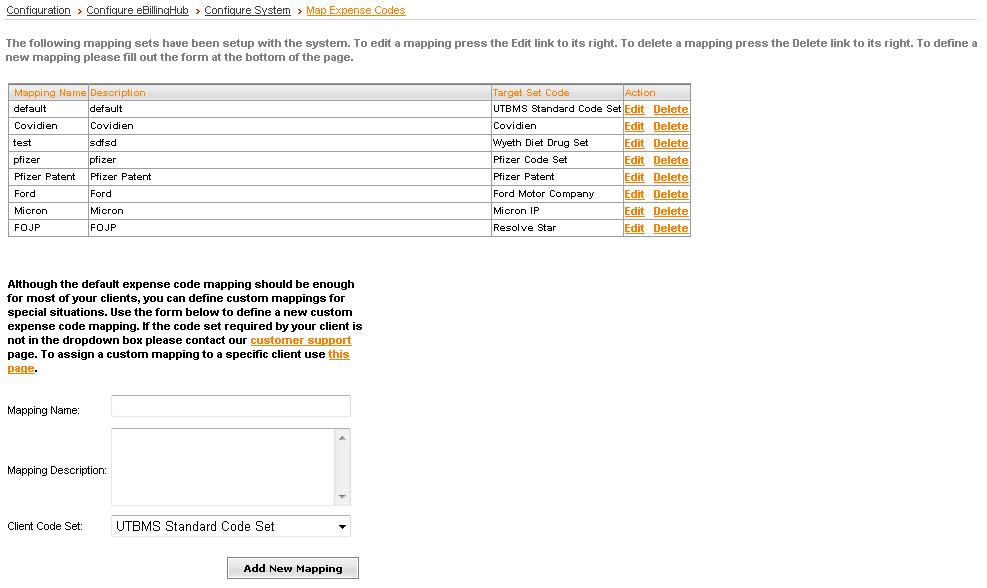
Expense Codes link. The Manage
Expense Code Mappings window displays with a list of all current
expense code mappings.

The first map is the default map. Each firm needs
at least a default expense code map. Set up the default expense code map
first.
- Click the Edit
link to edit a mapping. The Configure
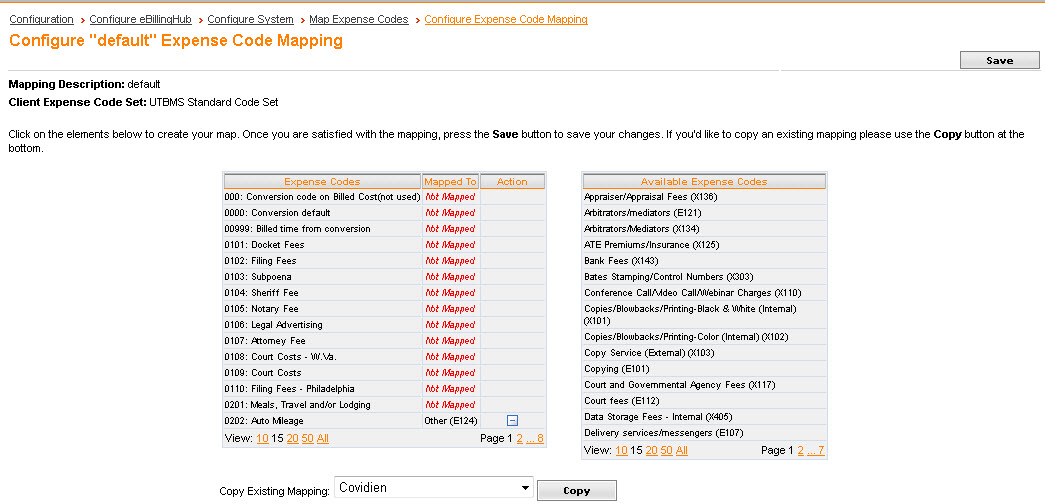
"default" Expense Code Mapping window displays.

- The local expense codes are listed
on the left, along with their current associations.
- The expense codes that are available
to map your local expense codes to are listed on the right.
- Do one of the following:
- Click the expense code on the table
on the right to add a new association or to change an existing one.
- Click
 to remove
an association.
- Click Save
when finished.
Note: It is not
necessary for you to keep client-defined expense codes within your Time
& Billing system, and eBillingHub will ignore those codes should you
choose to keep them. eBillingHub will always use this association table
to map from your local expense codes to the client-specified expense codes
list on the right. When you are finished mapping, click Save
to save your work.
Create a Client-Specific
Expense Code Map
You may need to set up a client-specific expense code map if a client
requires expense codes that are not part of the UTBMS standard code set,
or if the client requires that your local expense codes be mapped differently
from the way they are used for other clients. Multiple clients can use
the same expense code map, but a client can use only one expense code
map.
To create a new expense code map for a client:
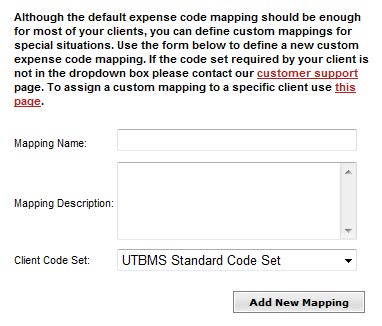
- Go to the bottom of the Expense
Code Mapping window.

- In the Mapping
Name and Mapping Description
field, type a mapping name and description.
- From the Client
Code Set drop-down list, select the client code set. The client
code set is the list of available codes when you edit your expense
code map.
- Click Add
New Mapping. The new expense code map displays in the list
of expense code maps.
- Click the Edit
link in the Action column
to edit the map.
- To copy an existing map, select the map
you want to copy from the Copy Existing
Mapping drop-down list at the bottom of the page and click
Copy. After the map is copied,
you can then make changes to the mappings.
Click Save
at top right to save your work.


 to remove
an association.