Map Clients
The Map Clients window is where users map clients in the Time and Billing
system to an eBillingHub client. This mapping determines the format of
the invoice, the data validations performed on the invoice and the destination
of the invoice.
Note: If a client
requires attachments to be sent with the invoice, or invoices must be
submitted to specific recipients, or invoices must be in a format other
than a LEDES format, see Enable
Attachments/Specify Recipients.
To open the client mapping:
- Open the Client Setups
tab.
- Click the
Map Clients link. The Clients
in your Time & Billing System window displays.

- Search for the client in your Time &
Billing system that you want to set up by doing one of the following:
- In the Search
locally by Client Name field, type all or part of the client
name.
- In the Search
locally by Client Number field, type the entire client number.
The search results display below the search controls
and include the local client number, local client name, and the currently
mapped eBillingHub client.

- Find the appropriate matching client within
the eBillingHub client library. The search results display below the
search controls and include the client name and whether the client
requires additional information that is not a standard part of your
Time & Billing system.
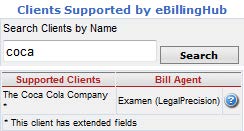
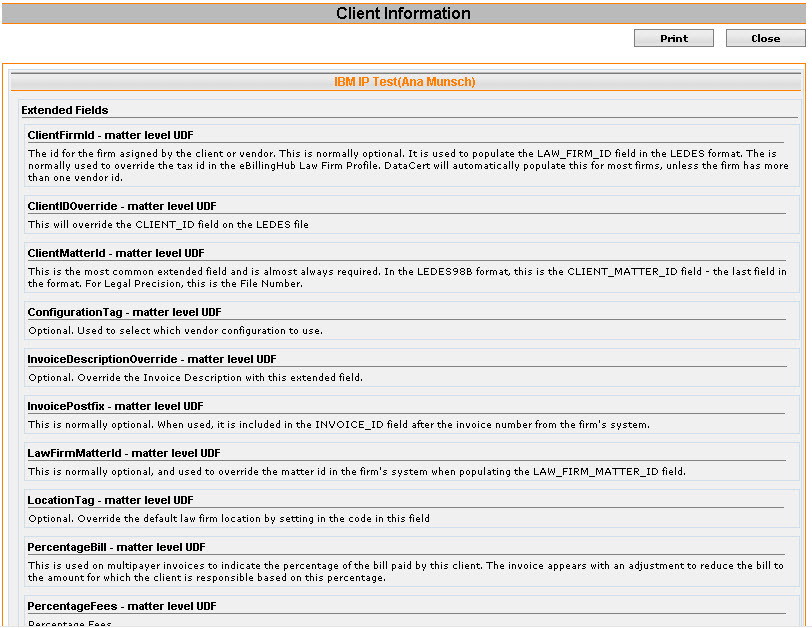
- Click
 for additional information about the client and vendor. The Client Information window displays.

- Do one of the following:
- Select a local client from the table
on the left and click the appropriate eBillingHub client on the table
on the right to add a new association or to change an existing one.
- Click
 to remove
an association.
to remove
an association.
- Click Save.