|
For eBillingHub to automatically communicate and deliver ebills to your eBilling vendors, you must create a new user account for each eBilling vendor. This account is used exclusively by eBillingHub for submitting invoices to that vendor.
The email address for this user account is the eBillingHub email address for your firm that is defined during the initial eBillingHub implementation process. This setting allows emails from the eBilling vendors to come to eBillingHub, where eBillingHub uses them to automatically update the invoice status, and then forward them to eBillingHub users based on the email preference set in their user profile.
You only need to create a new user account for the eBilling vendors you currently use. You can create a new user account at any time if you start using a new eBilling vendor.
Accessing Configure eBilling Vendor Connectivity
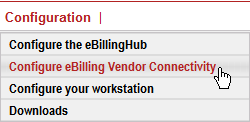
To access the screen for configuring vendor connectivity, select Configure eBilling Vendor Connectivity from the Configuration menu:
|

|
Only users assigned the Administrator role can access the vendor connectivity setup screen.
|
General Procedure for Configuring eBilling Vendor Connectivity
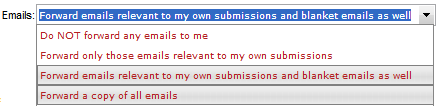
1. View the user profile for the eBillingHub user who is responsible for handling ebills for this vendor. Verify that the Emails field is set to one of the following options:
· Forward emails relevant to my own submissions and blanket emails as well
· Forward a copy of all emails
2. Log into the eBilling vendor site with an existing login that has permissions to create a new user account.
3. From the Configure Vendors screen in eBillingHub, click on the link for that vendor to display the Configure Connectivity screen.
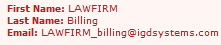
4. Use the first name, last name and email address listed in the shaded box as the information to create the new user account at the vendor site.
|
|
You must use the name and email address from the Configure Connectivity screen! It is highly recommended that you copy and paste the email address from the Configure Connectivity screen into the new user information on the eBilling vendor site. If the email address in the eBilling vendor's user record doesn't match that shown on the Configure Connectivity screen, eBillingHub won't get emails from the vendor.
|
5. When you receive the password for the new user account from the eBilling vendor, test the login by logging into the site with the new credentials.
|
.png)
|
Use the link (if available) at the bottom of the Configure Connectivity screen to directly access the vendor's site.
|
6. Go to the function to upload invoices, and make sure the site looks the same way it would if you were manually submitting invoices. It is recommended that you manually submit an invoice as a test.
|
|
Many vendors require new users to change their initial password or accept terms and conditions when they first log on or upload an invoice.
|
7. After the new login has been successfully tested, come back to the Configure Connectivity screen for that vendor and enter the new username and password. Leave the configuration list box set to default.
|
|
eBillingHub uses this default logon configuration when submitting client invoices to the eBilling vendor. If you require a different set of logon credentials for one or more clients, you must configure an alternate configuration specifically for those clients.
|
8. Click Save to save the connectivity settings.
|
|
Sometimes eBilling vendors set the password to expire after a specified number of days. If this occurs, you need to access the Configure Connectivity screen for the vendor prior to the expiration date and enter the new password.
|
Related Topics
.png) Configuring Alternate Logon Credentials for an eBilling Vendor Configuring Alternate Logon Credentials for an eBilling Vendor
Assigning User Access Roles
|