|
The Manage Users screen provides options for managing account information for eBillingHub users. Specifically, these options let eBillingHub Administrators perform the following tasks:
· Create and delete user accounts
· Assign user roles for accessing eBillingHub screens
· Edit user account information
To create a new user account, follow these steps:
1. Select Configure the eBillingHub from the Configuration menu.
2. Click the Manage Users option from the Configure Profiles tab to display the Manage Users screen.
3. Click the New User button.
4. Enter the user's name, email, phone, and fax information (if applicable).

5. In the Emails field, select one of the following options:
Do NOT forward any emails to me
If this option is selected, no email notifications will be sent to you.
Forward only those emails relevant to my own submissions
If this option is selected, you will get emails for invoices you submitted that eBillingHub is able to profile (relate to a specific invoice).
Forward emails relevant to my own submissions and blanket emails as well
If this option is selected, you will get emails for invoices you submitted that eBillingHub is able to profile, plus emails that eBillingHub has not been able to profile.
Forward a copy of all emails.
If this option is selected, every email notification will be sent to you.
6. In the User Access Role field, select one of the following options:

Click here for a description of each option. Note that if you select the Administrator role, all other roles are selected by default. You can assign more than one role for a user. If you assign the Editor role, you should also assign the Biller role since the eBilling Editor is accessed from the billing screens.
7. Click Save New User to save the new user account settings. This action also sends an email to the email address specified in the new account. The new user must click on the URL in the email to access their account with the Username and Password provided in the email.
To delete a user account, follow these steps:
1. Click the Delete link for the user account you want to delete. This action displays a confirmation box similar to the one shown here:
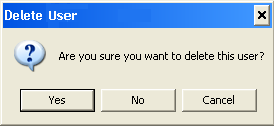
2. Click Yes to confirm the deletion. This action removes the user account record from the users list and puts it in the Inactive Users list. (Deleted user accounts remain in this list indefinitely unless restored.)
3. (Optional Step) To view user accounts in the Inactive Users list, click the Show Inactive Users checkbox:

To restore a deleted user account, contact Customer Support.
To edit (or view) a user account, follow these steps:
1. Click the Edit link for the user account you want to edit. This action populates the Manage Users form with the account information.
2. Edit the desired fields, and then click Save User.
Related Topics
.png) Changing Your Password Changing Your Password
Changing the Interface Theme
|